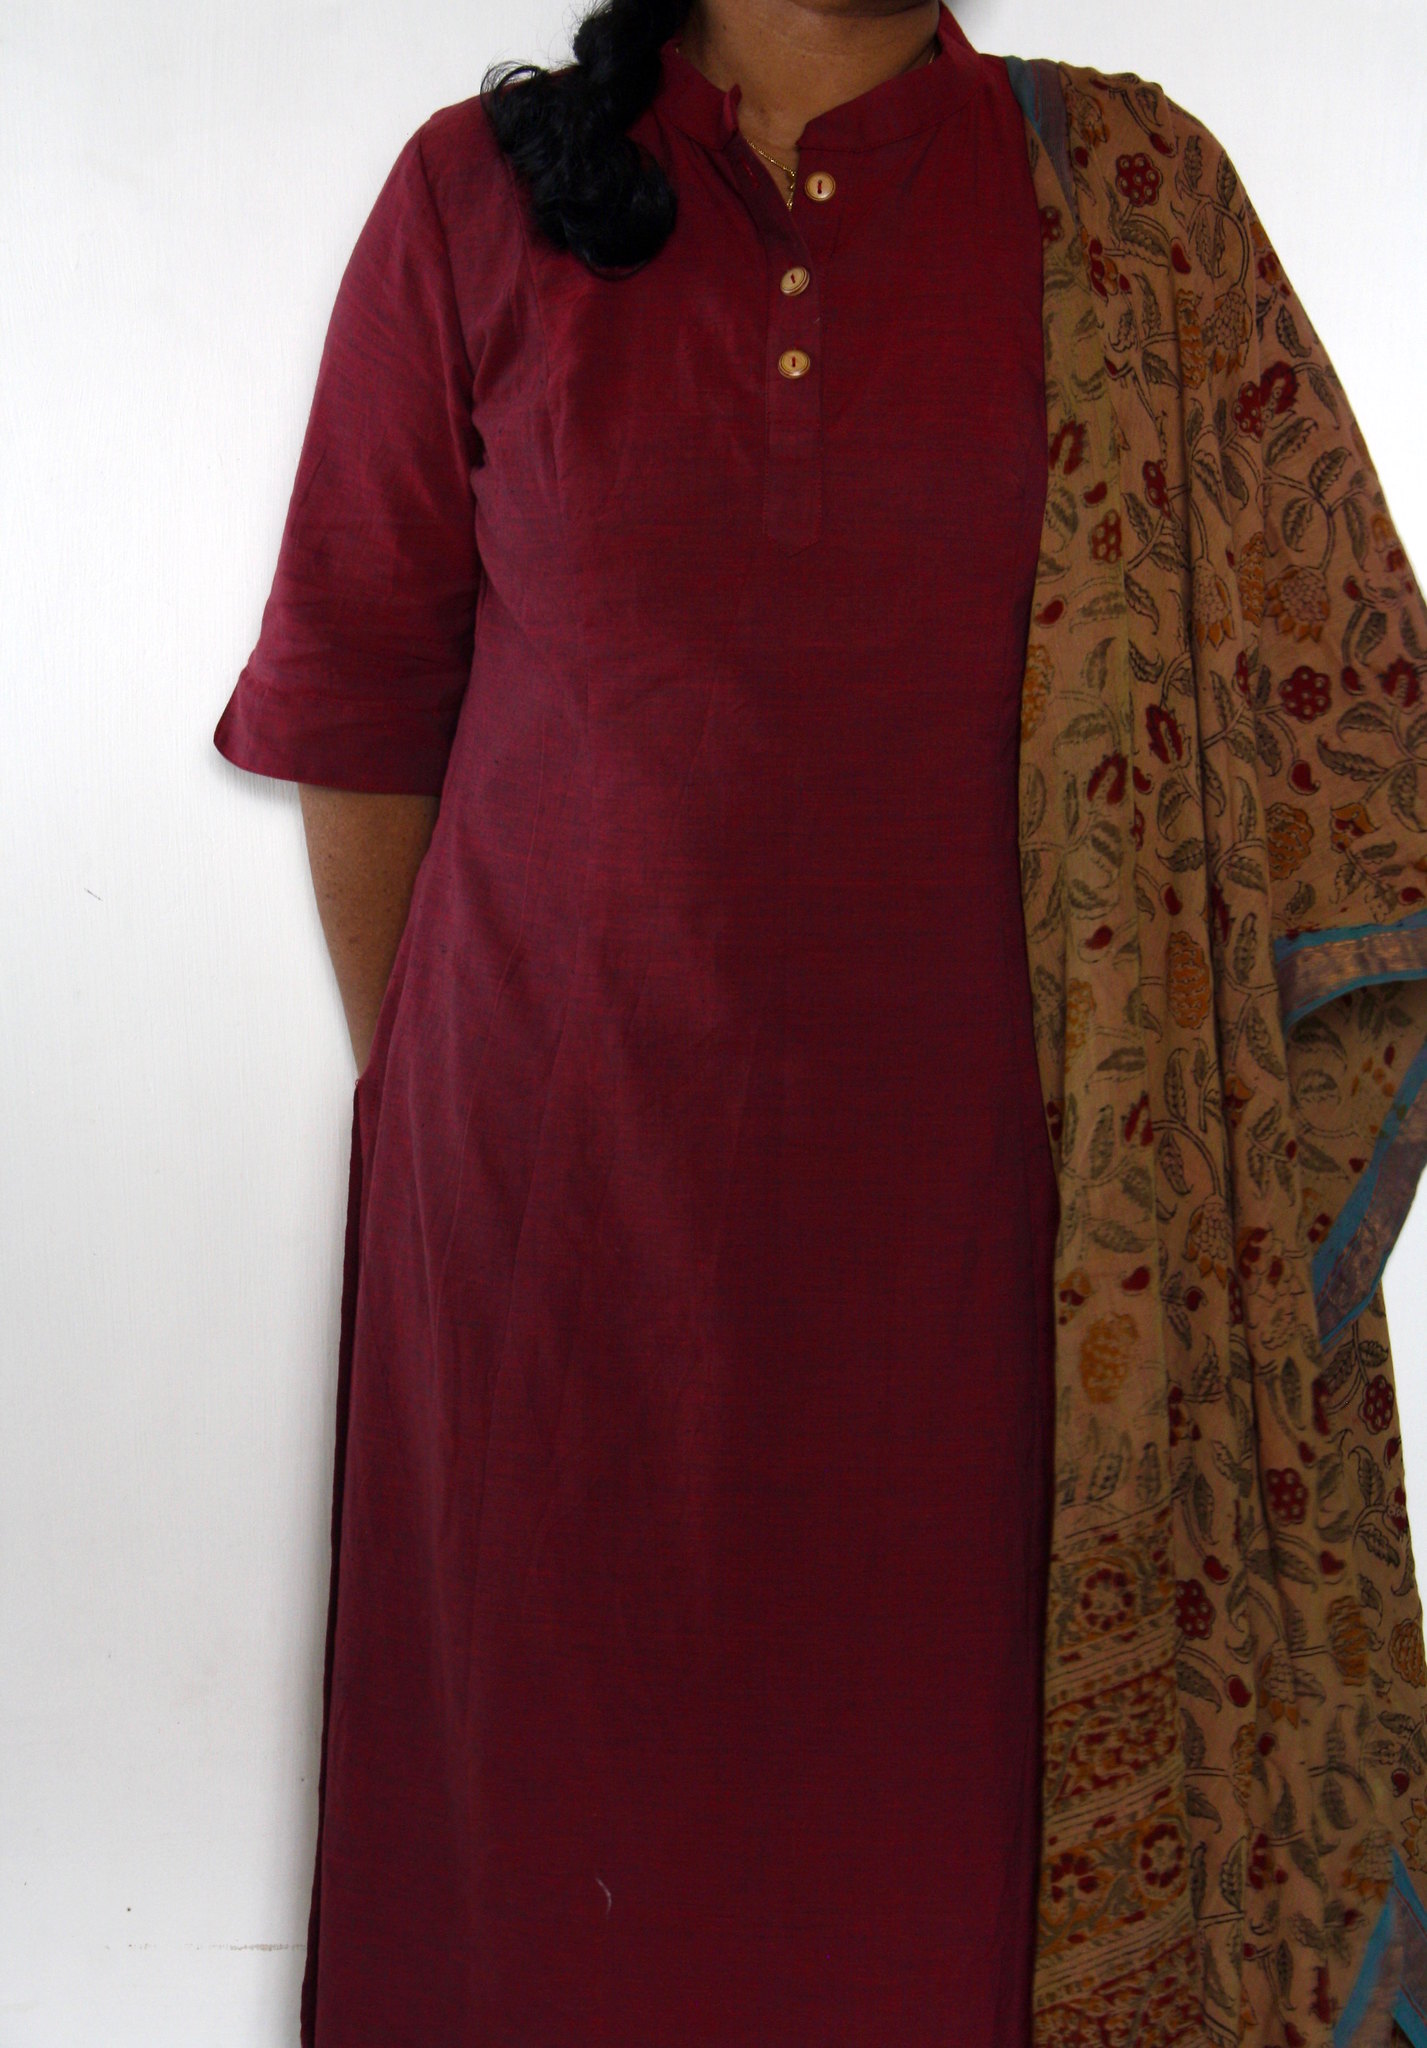
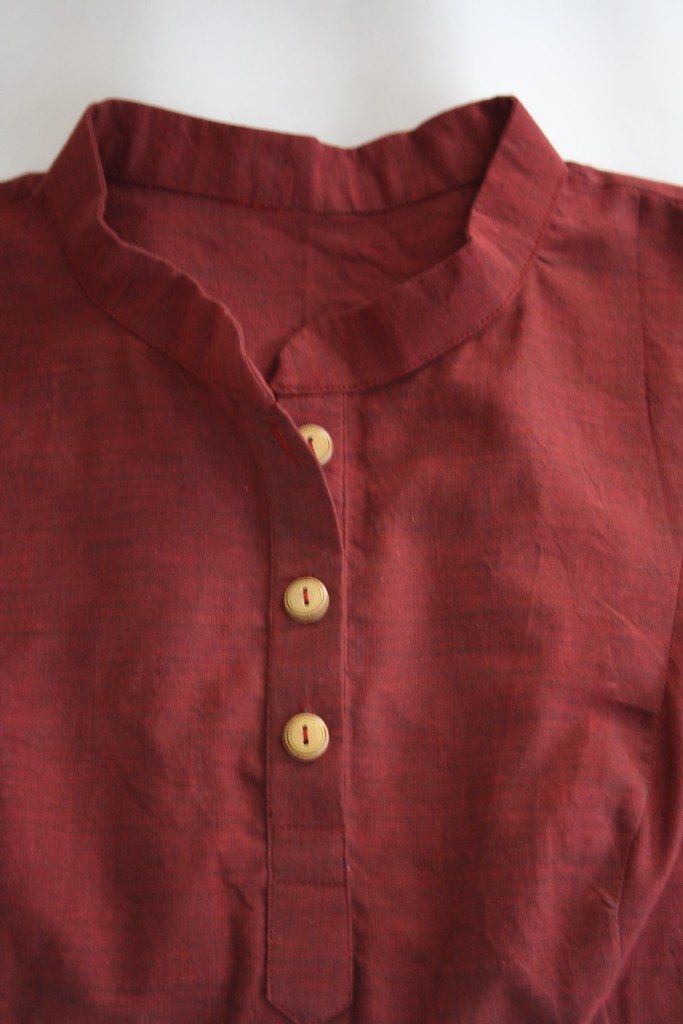
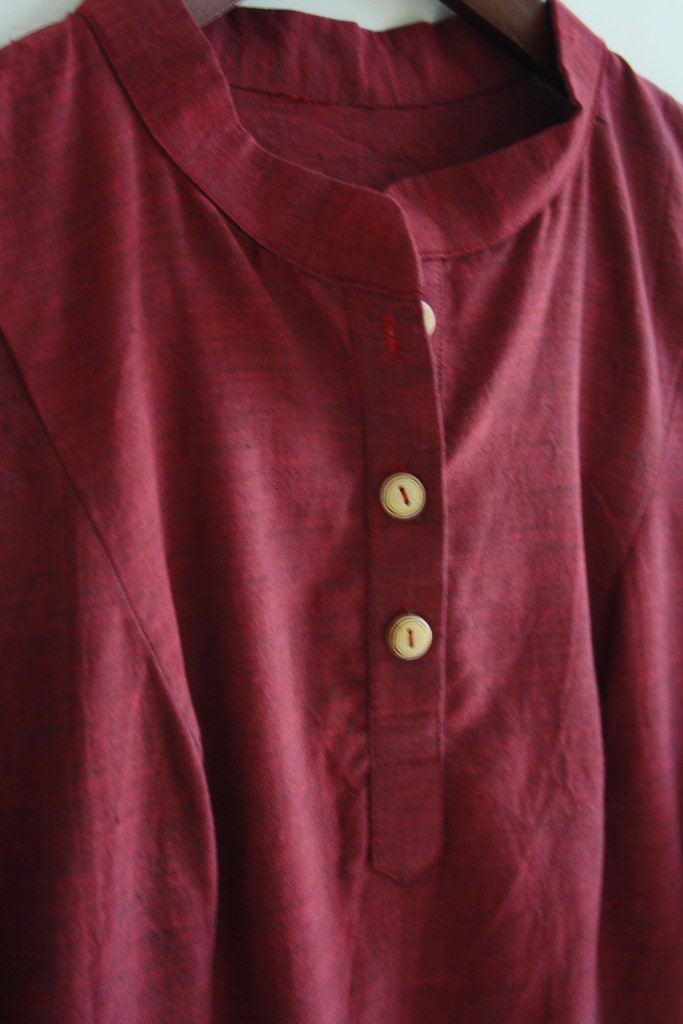
Maroon Kurta
VINTAGE PATTERN to HANDLOOM KURTA
Its been two years since i have started making kurtas (tunics!!!) for myself and a lot of learning happened since then.
A Prima pattern(May 2009) was used as the base pattern(I got some Prima patterns which originally come along with the magazine, off ebay couple of years back). Techniques such as removing darts, rotating darts, slashing and spreading the pattern were all used to make it a TNT (Tried and True). Lot of my learning is from fellow bloggers and threads magazine articles and i am really thankful for all the information they have shared freely. This TNT is what i reach for when i need to make a quick one as it is dartless.
Here is the magazine tear-off of the prima pattern that i started off with 2 years ago.

I extended the pattern straight down and put some slits on the sides to make it a kurta. That was my starting point. Adjusting it to my petite-self and arriving at a TNT pattern, took a lot of time, fabric and patience. Luckily all the versions were wearable atleast in the house and to run errands.
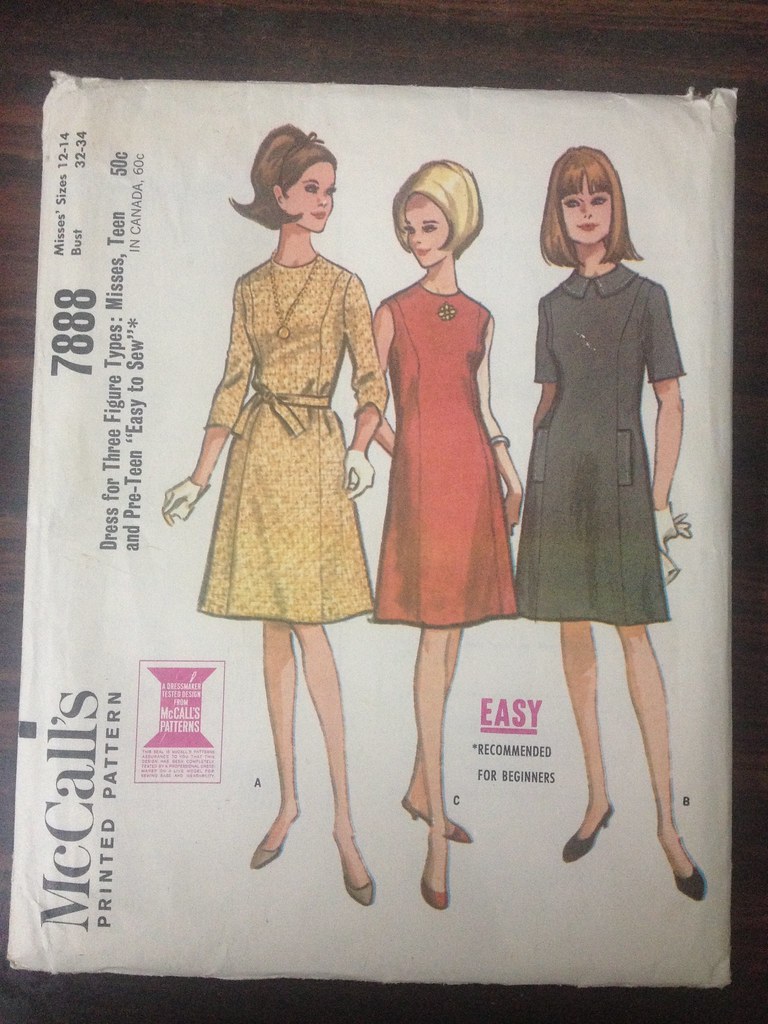
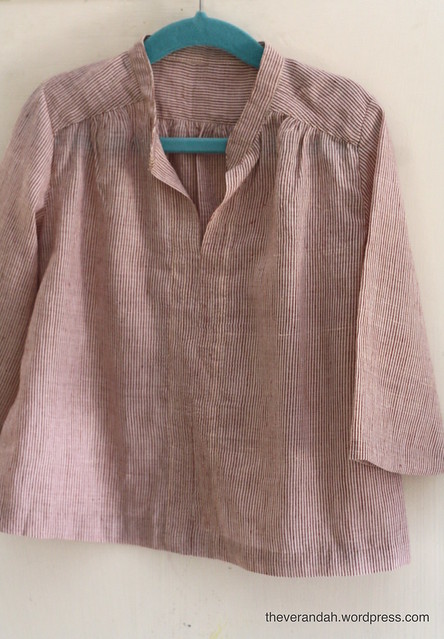
Today its a vintage McCall’s dress pattern that is converted into a kurta. Its the shoulder princess seams that called me to try this pattern.
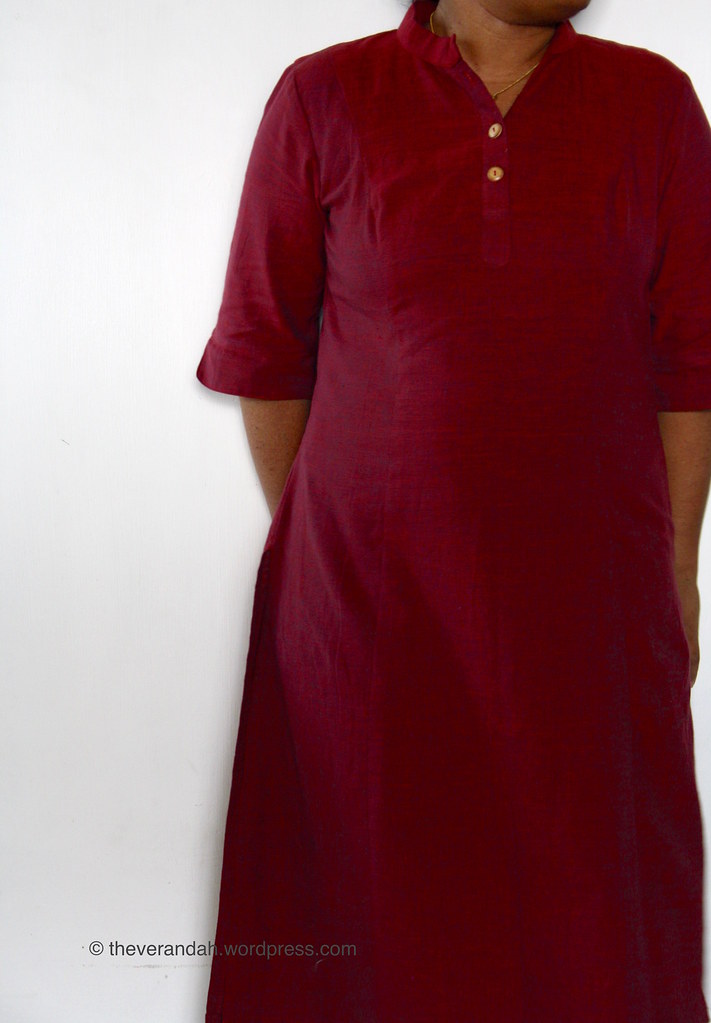
Fabric: Brick red and black shot cotton from DAMA (this seems to be thicker than mangalagiri cotton).
Pattern: McCalls 7888 (Size 14)
Pattern Adjustments:
1. Removed 1″ length from all body pieces at the increase/decrease line.
2. Added 1″ flare to all the front pieces (should have added a proportional amount to the back too….a note for next time).
3. The arm hole curve (of both front and back pieces) is from my existing TNT kurta pattern, so that existing TNT sleeve pattern can be used.
For most of the commercial patterns that i have, I found that the sleeve caps are too high and i have to do a large arm adjustment, so i find it easy to use my TNT sleeve pattern and so i adjust the armhole on the body too.
I am also not a fan of sleeve-cap ease. Too much fiddling and too many pins. After reading about zero sleeve-cap ease, i changed my TNT kurta pattern and sleeve to reflect that and its now so easy to sew the sleeves.
Notes:
1. Placket tutorial from Professor Pincushion Youtube channel.
2. Collar drafting from Creative Curator
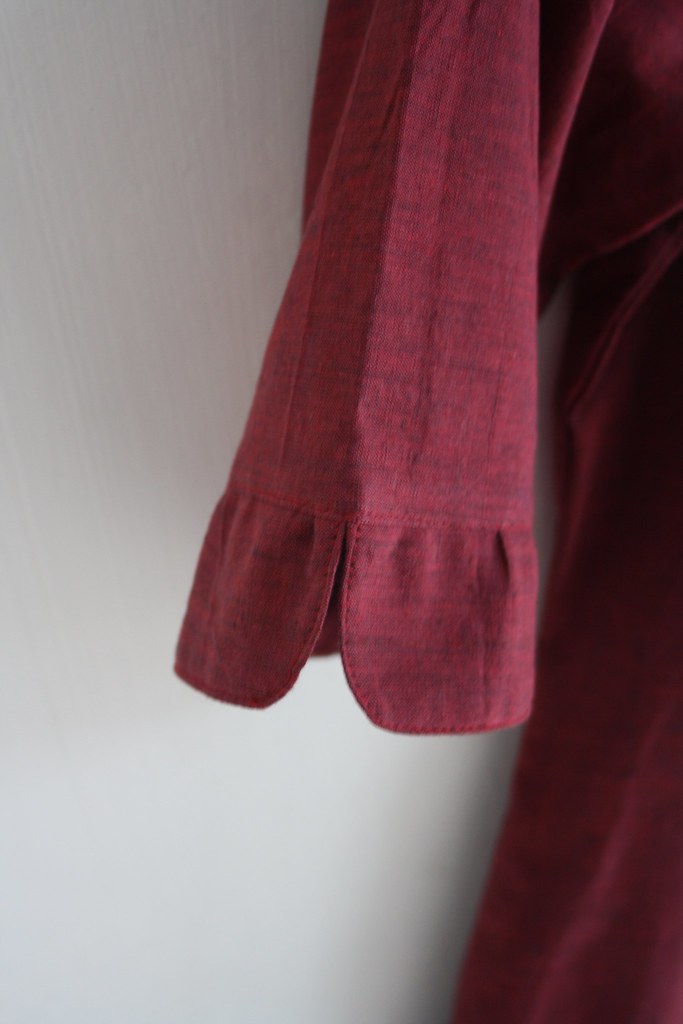
3. The sleeves are a Pinterest inspiration.
4. Even though i made a straight 14 size, I had to do some adjustments in the bust area and next time i will blend the front pattern pieces from 12 to 14 near the waist.
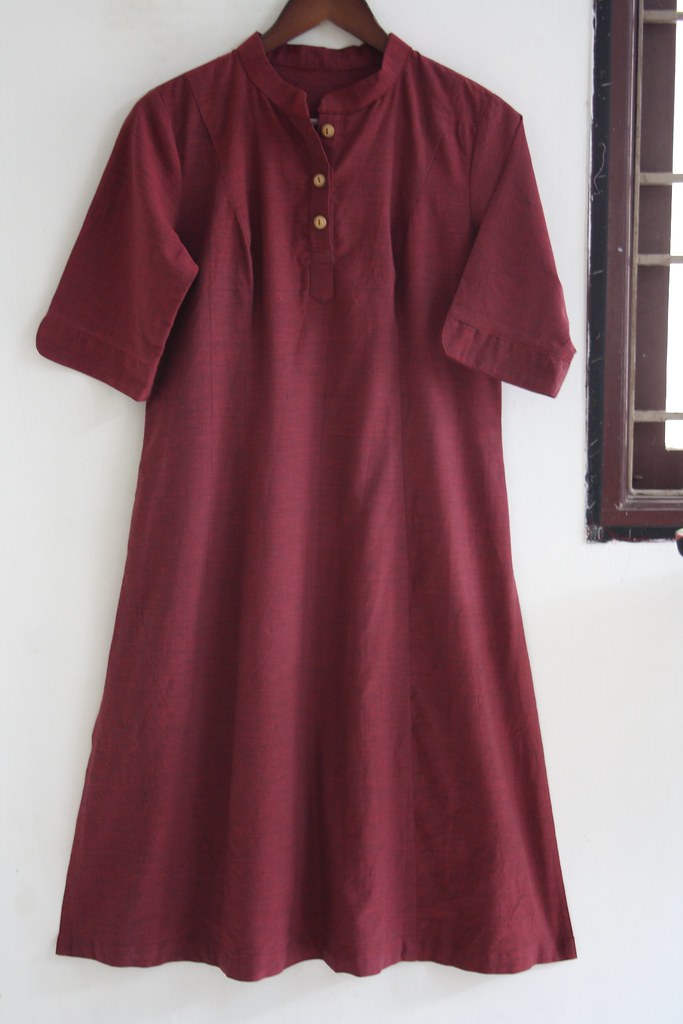
Final Verdict:
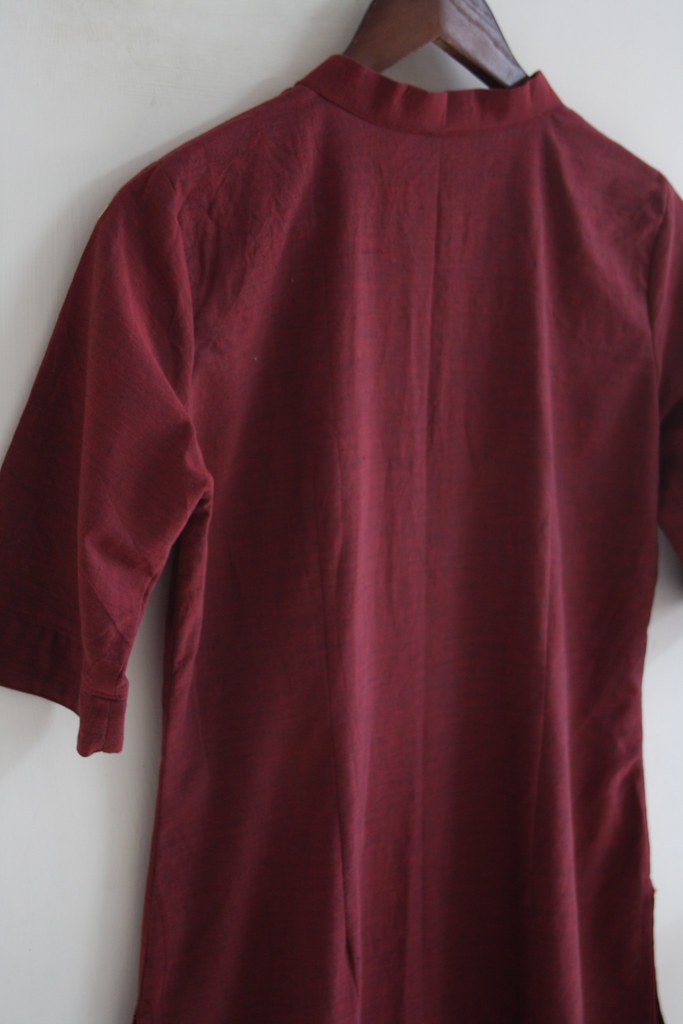
The kurta fits beautifully (hides all the lumps and bumps) and i love the back. The shaping with the darts is almost perfect (sorry no pictures). I might move them 1″ up on my next version. This could be my new TNT pattern only for the back… its just transferring the dart markings and sewing the darts, that is a pain.
Notes for making your kurta:
What has worked for me might not work for you.
1. I have tried drafting kurta patterns as per some instructions on blogs and youtube videos, where the only difference between the front and back is the armhole curve… It didnt give me a good fit. What i found is the back bodice should be a little longer near the shoulders than your front so that it wraps that shoulder curve properly (hope it made sense).
2. Commercial sleeves patterns didn’t work for the fact they kind of restricted my arm movement especially when doing chores where i had to stretch my arms.
3. If you are on a fence about sewing your own kurtas… take a spin on free blouse pattern. Sorbetto by Colette is a good starting point especially as they have added the sleeves. Remove the front pleat, extend the pattern and add some side slits for your kurta muslin.
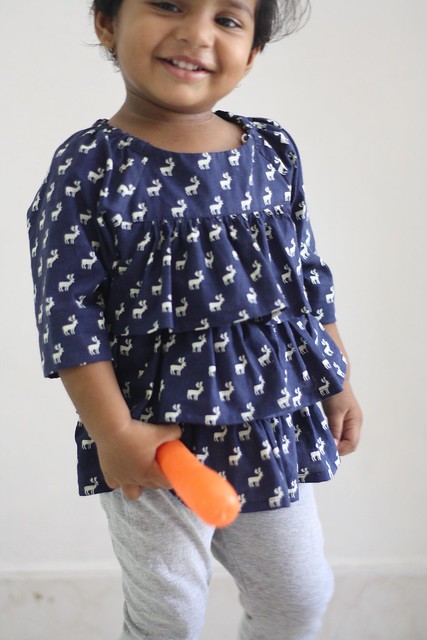
Ruffled Picnic Blouse
FLASHBACK 2016: SUMMER SEWING for J
The picnic blouse is like a blank canvas. There are lot of simple modifications that can be done to change the whole look.
This version is a mash up of Oliver+S patterns Class Picnic Blouse and Ruffled Halter top inspired by a RTW top J has. I didn’t want to stitch the ruffles down to a base but have the layered ruffle skirt effect.
Pattern: Picnic Blouse by Oliver+S
Size: 18-24m
Fabric: from cotton street, Egmore.
Notes:
I got 2m of this fabric of which a little above a metre was used for H’s skirt. I did my math and drew every pattern piece onto paper and played with the placement of pieces as there is no second chance due to fabric limitations.
I don’t really remember the math now but here are some in-progress pictures to give you some idea.
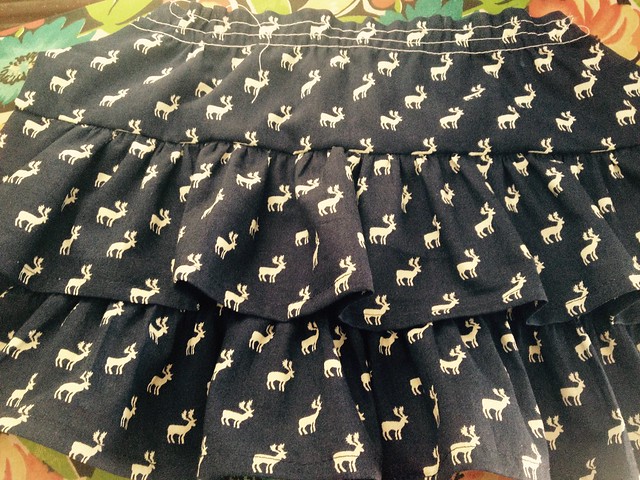
Two ruffles done… the third(the top most)ruffle and the body in the pic needs to sewn into the yoke.
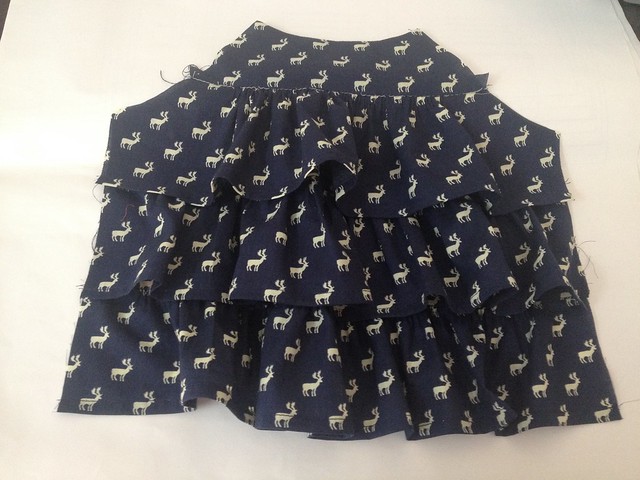
Front piece done.
As the bottom most ruffle is already hemmed.. the back body must be hemmed before doing the side seams. So once the front is ready and the back is hemmed…just follow the original instructions.
The blouse turned out lovely, i just wish i made a size larger for her as she outgrew it in couple of months.
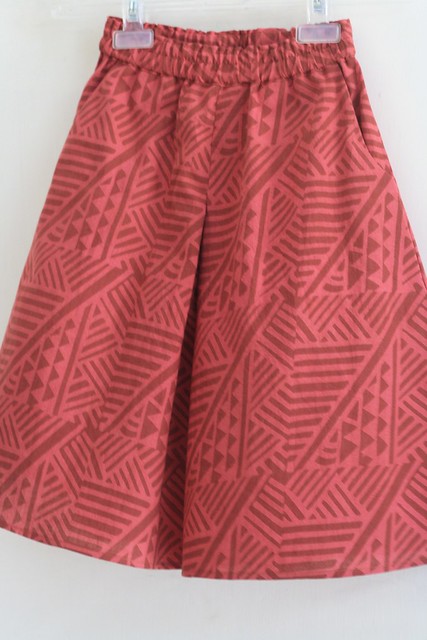
Pink Mini Tania Culottes
FLASHBACK 2016: SUMMER SEWING for Ms H
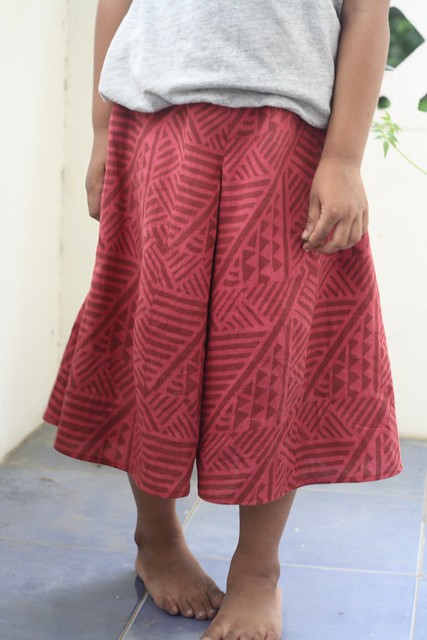
This is “KCW Spring 2016” make for Ms H. The geometric print fabric is a lovely purchase from Mrignayanee, Chennai.. nice place to pick Bagh prints and Batik prints in cotton. MS H is sold on it being pink 🙂
Pattern: Mini Tania Culottes by Megan Nielsen
Size: 4/5
Fabric: Block Printed Cotton from Mrignayanee.
Notes:
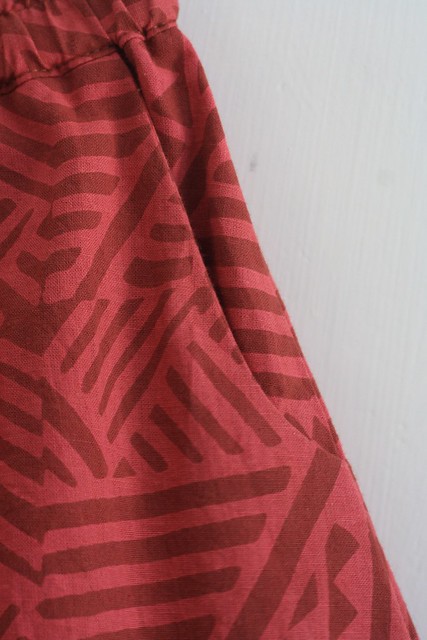
The pattern and instructions are followed with no modifications except for the addition of a pocket, for which there is a tutorial and a pattern piece (i modified the pocket pattern a bit) on Megan’s blog.
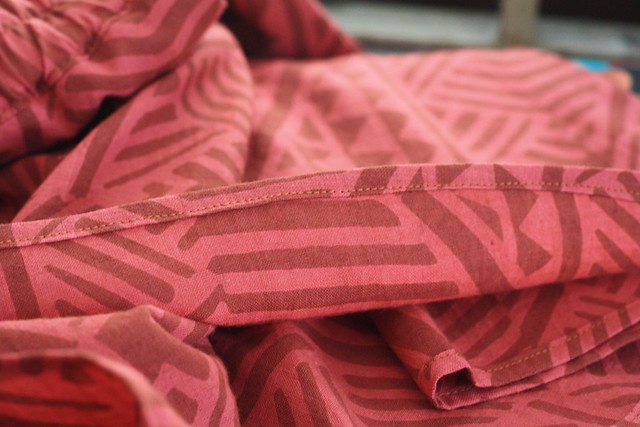
Showing off my hem… there was quite a lot of hemming to be done and nothing can beat a good pressing and tonnes of pins…

With the way Ms H was sitting(especially when she is sitting cross legged on the floor) , there was a lot of strain on the front pleat stitches. The fabric being thin, teared away and had to be repaired twice.
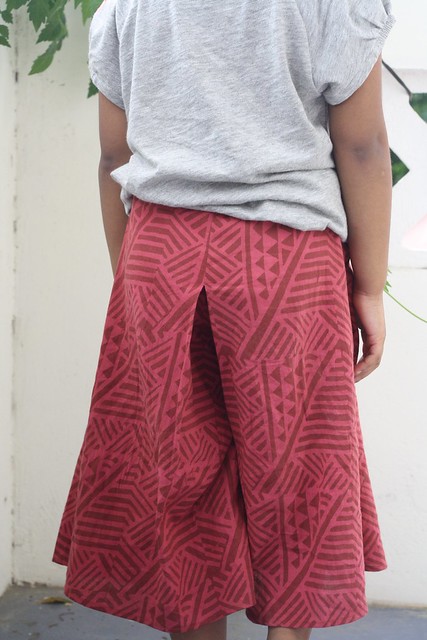
I wasn’t really happy with how it looked from behind…. So next time i will see how it looks by removing the back pleat totally.
But Ms H looked cute in it and she really loved wearing it. May be some printed rayon next time???
Writer’s Block
HELLO
It has been long time since i have seriously looked at my blog.
The past year has been quite busy… finding time and inclination to blog hasn’t been the priority.
Ms H started a new school and so a new routine.
Ms J has to be under constant surveillance after she stopped her morning naps around 8 months back.
We also had lot of house guests last year and while it made me busy… the kids also got lot of clothes as gifts. So i wrote a fresh sewing plan and concentrated on sewing for myself and made myself a fresh wardrobe.
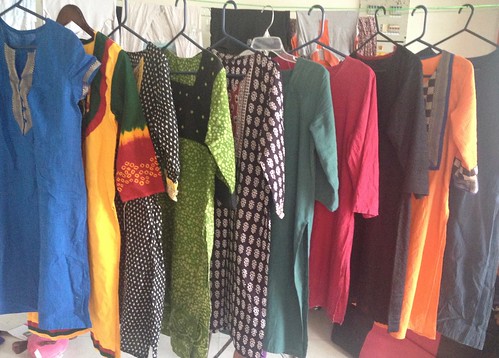
This means….
1. I made around dozen kurtas in the past 10 months.
2. I researched and read a lot of blogs, articles on fitting issues, pattern modifications, dart manipulations, finishing, dress making and more.
3. I squirrelled a lot of fabric for my pinterest inspired projects.
4. I neglected my own blog and also stopped following some of my fav blogs around kids sewing.
i will start documenting my previous years projects in the coming posts.
Khadi Picnic
KHADI PICNIC WITH FAUX SMOCKING
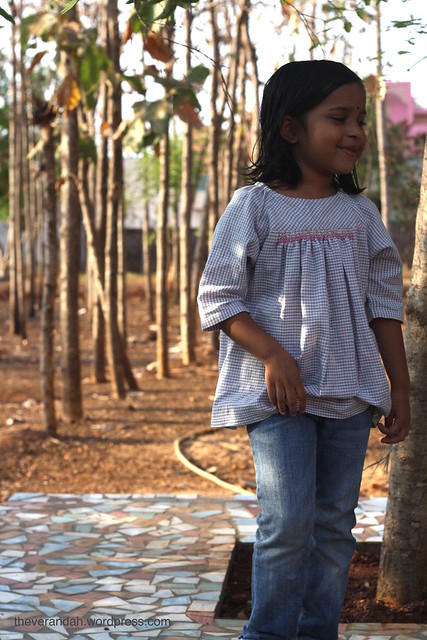
Its Asmita who inspired me to pick some khadi fabric when she made some lovely moon pants for her daughter. So on a trip into the city 2 months back, i picked some khadi fabric, the thinner variety, which is almost like voile. I made two blouses for H, inspite of my reservations… she loves both, you can see the Khadi Ayashe here. I am looking forward to see them after a couple of washes when they have really softened.
After the wearable muslin for Ms H, I realised that she can still wear a size 4 with added length for both body and sleeves. while i am there i also added quite a bit of width to the blouse. I think this changed the whole look, while the original is more tailored, this version is more relaxed.
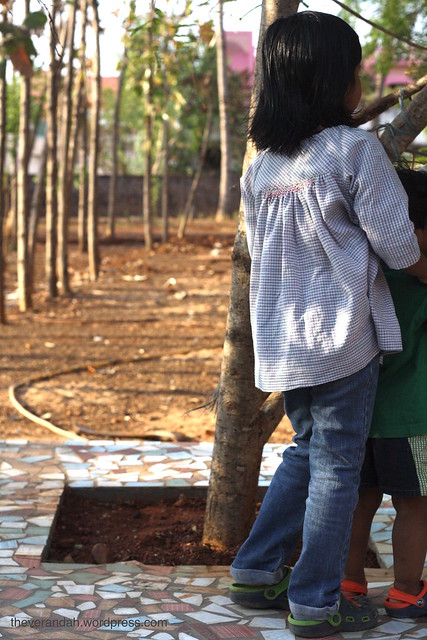
If you look closely the stripes do go in different directions for both body and sleeves, which i didn’t realise until after i finished the blouse. They don’t seem to bother anyone except me.
Pattern: Picnic Blouse by Oliver+S
Size: 4T with modifications
Fabric: Khadi voile from Khadi Gramodyog Bhavan
Notes:

Added length and width to the body (don’t remember the numbers now).
Hemmed the sleeves by turning in 1/2″ twice as i forgot to add length.
All hemming is by hand as the fabric seems to hang better this way.
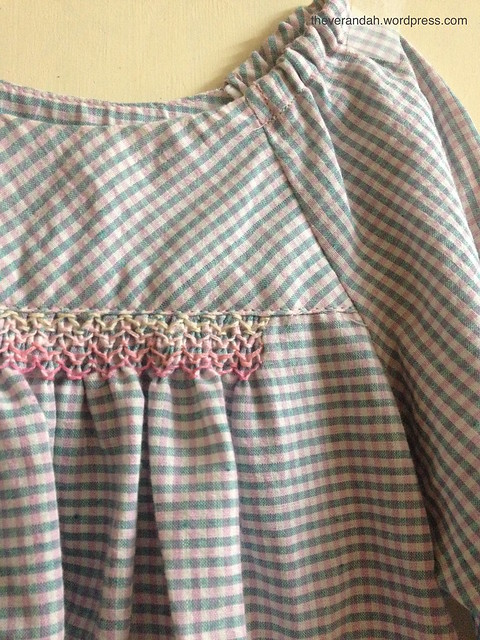
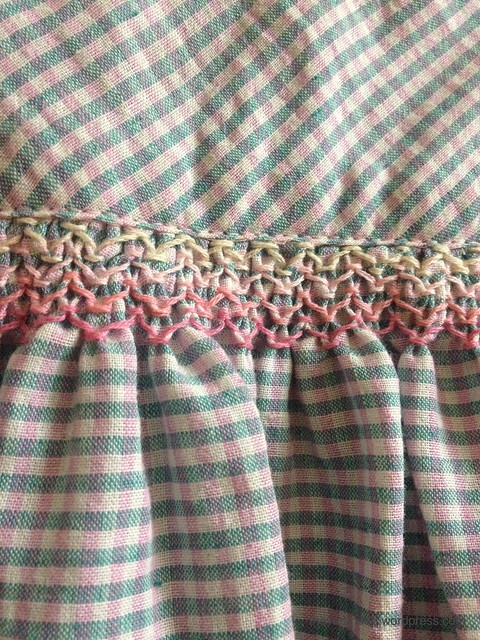
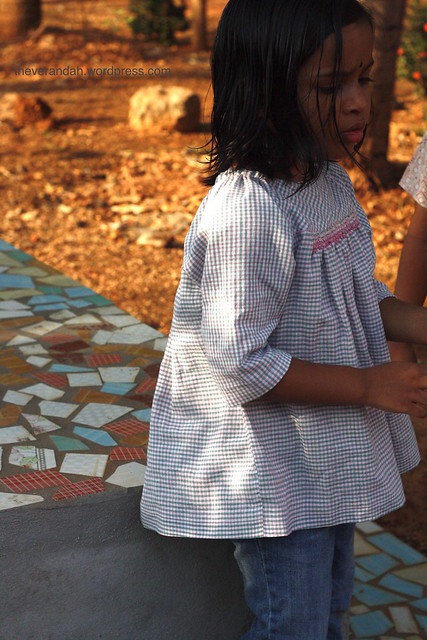
And about that tiny bit of faux smocking in the front and back….. After the entire blouse is finished and as i was taking out my gathering stitches, i thought the blouse would have looked nice with some smocking and may be i should do that next time. But that little thought was there and the more i looked at the blouse, the more it bothered me… so i added couple of rows of smocking stitches and put that thought to rest 🙂 The fact that it is a checked fabric made the embroidery easy.
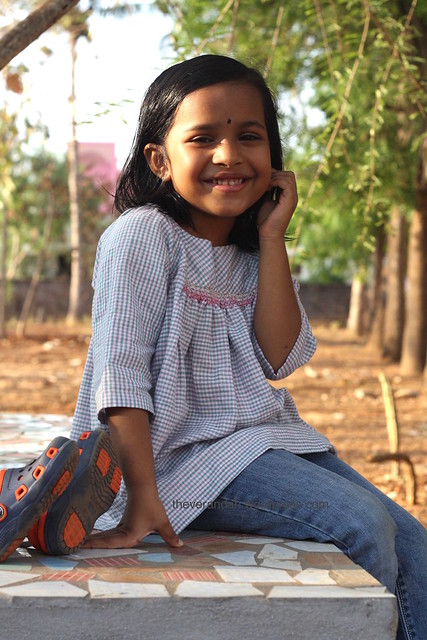
Here are some more pictures of Ms H wearing it.
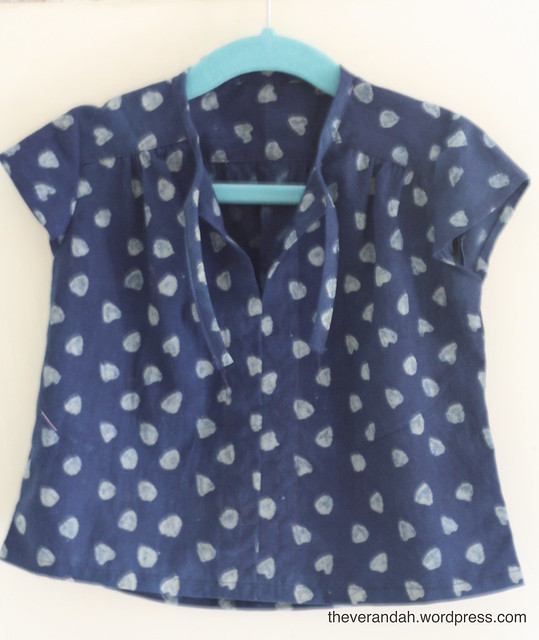
Ayashe Sisters
Ayashe Sisters
Here are the girls wearing their Ayashe blouses, for a trip to cinemas to see the Kung Fu Panda 3.

I was looking for a blouse with back yoke but not a button down shirt when I discovered this pattern. Even though I am late to jump on the Ayashe blouse pattern, happy I jumped.
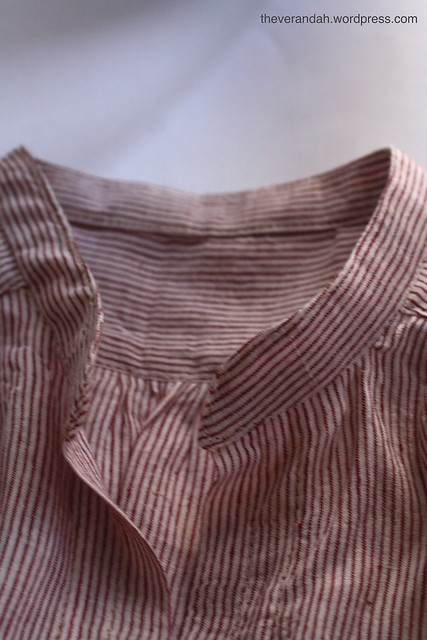
Also I finally dipped my sewing feet in Khadi and i am glad i did. The stripped khadi (Ms H’s blouse) is like a light weight voile and presses beautifully. My machine loved it so much that it tried to eat it couple of times. Ripping the seams is not easy on this fabric and it does ravel a bit and stretches out of shape easily especially on sleeves and necklines.
Pattern: Ayashe blouse by Figgys
Size: 4/5 and 18M
Fabric: Khadi stripes from Khadi Gramodhyog Bhavan
Mud resist indigo dyed cambric from Mrignayanee.
Notes:
There is no elastics or drawstring tie in the hem for both the blouses.
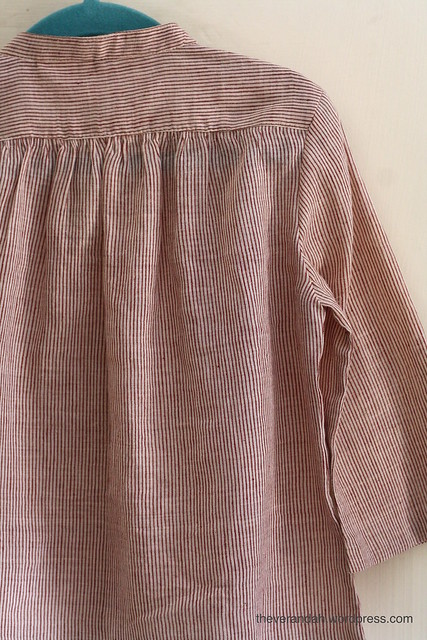

For the Khadi blouse, the hem and sleeves are hand hemmed. The sleeve length is reduced so that its more like ¾ sleeve and there is no elastic in the sleeve. As i was setting-in the sleeves, i stay stitched the sleeve head which prevented stretching.

This is my first collar and it came out really nicely, again stay stitching the neckline is the key.
For the Indigo blouse, I pre hand-hemmed the sleeves and set them in flat even though the instructions say other wise. The short sleeves are super cute but a bit difficult to set them in round and hem them later.
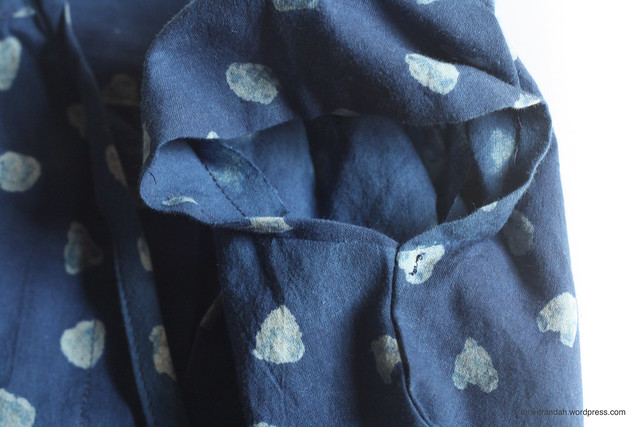
I wish I made the neck ties a wee bit longer.

Another thing is the neck opening, while Ms H could put it on without much difficulty she complained that the neck opening was a bit low… while an old camisole solved the problem temporarily, i should add a hook/eye. For Ms J, I trimmed the neck line near the shoulders so that her head goes through.
Overall lovely blouses for summer.
Batik Picnic
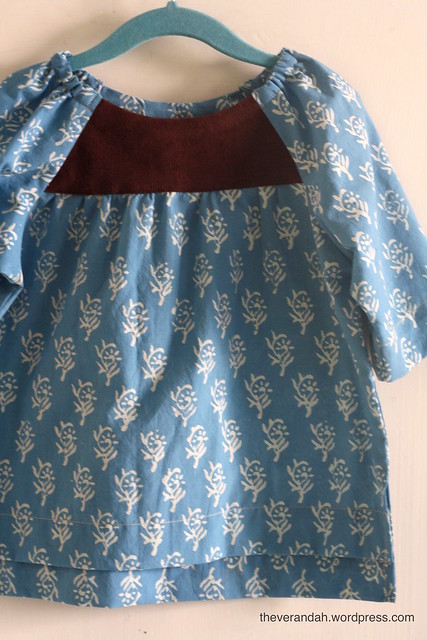
Blue Picnic
While i am enjoying Ms J’s toddler years, it is also interesting to see how Ms H’s character is changing and adapting around her younger sister.
Ms H always asks me what i am making and for whom i am making (with regard to sewing projects). She always insists to match her younger sister and wants me to make a similar thing for her too.
After seeing Ms J’s Bagh Picnic, she asked for a pink Picnic blouse for herself. I didn’t have any more of that fabric and also i have the pattern in smaller size.
While she does fit into size 4 measurements as she is slim built, i thought its a good idea to do a muslin first. As this is supposed to be a wearable muslin, i thought why not put some fun detail. The pattern has straight sides and a straight hem…. giving out a lot of ideas/possibilities for customisation/pattern hacks.
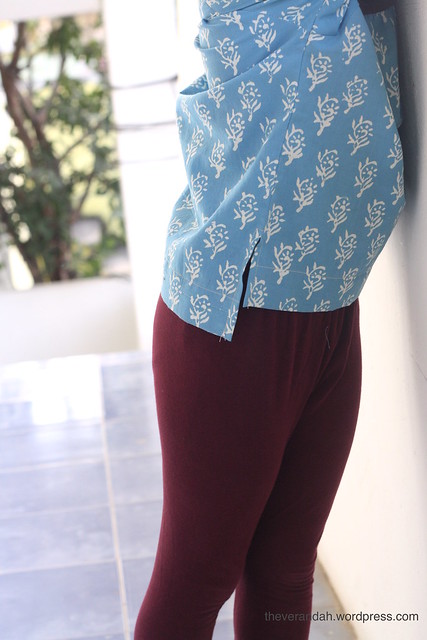
A picnic blouse with Hi-lo hem and slits on the side.
Pattern: Oliver+S Picnic Blouse
Size: 4T
Fabric: Batik Print cotton from Mrignayanee used for Ms J’s dress here and a small scrap of brown corduroy.
Notes:
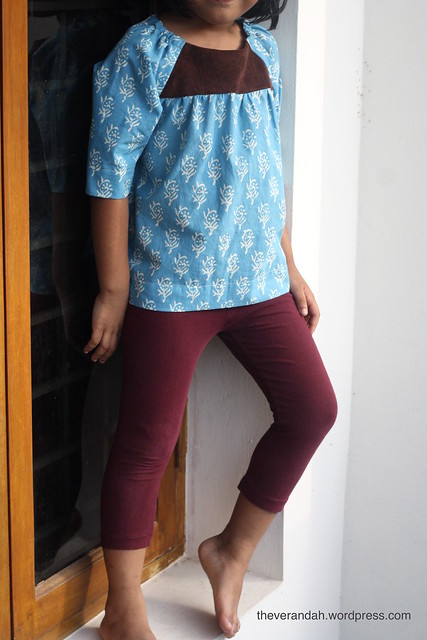
Ms H fits well into size 4 but needs length in both body and sleeves. Its been almost 2 months since i made it and though she didn’t reach for it by herself, she never said ‘NO’ when i suggested her to wear. The fabric is light and floaty and perfect for the growing temperatures.
I added 3/4″ for the back hem and reduced 3/4″ from the front hem. I didn’t add any extra seam allowance for the slits.
One more picnic is already in works, this time with added length.
